
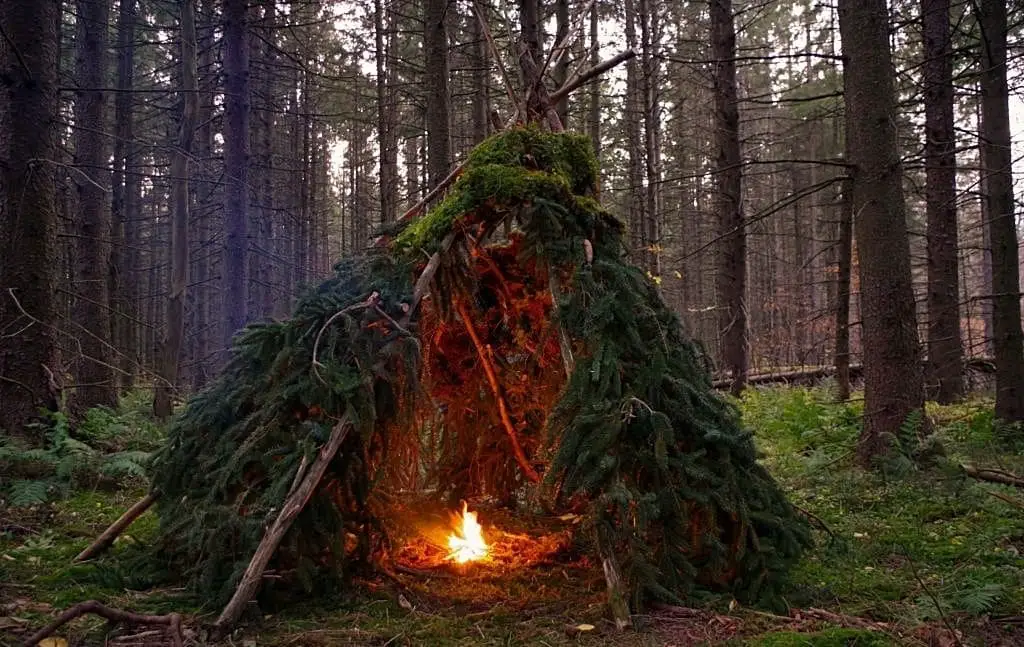
Shelter craft / woodland field guide
How to Make a Wickiup
Build a stable frame, shed wind and rain, insulate yourself from the ground, and leave the site responsibly.
A note on the name
“Wickiup” is an English-language term used for several forms of domed or conical dwellings made by different Indigenous peoples of North America. Designs, materials, names, and cultural meaning vary by nation and place. This guide does not recreate a specific traditional dwelling; it describes a temporary, wickiup-style wilderness shelter built with the same broad principle: a flexible pole frame beneath layered covering.
A shelter is successful when it protects you from wind and precipitation without creating a new hazard. The fastest build is not always the best one: site selection, drainage, frame stability, and ground insulation matter as much as the roof.
Do not light a fire, stove, candle, or heater inside or against a shelter made from branches, leaves, bark, or evergreen boughs. Flame can ignite the covering, while smoke and carbon monoxide can incapacitate you. Follow local fire restrictions and use only a safe, legal outdoor fire location well away from the shelter.
Before building
What This Shelter Does
A wickiup-style shelter uses long poles arranged into a dome or cone, reinforced with crosspieces, and covered with layers that block wind and shed water. A compact shelter warms more easily from body heat and needs less material; a larger one takes longer to stabilize and cover.
Temporary protection in a wooded environment where collecting dead material is legal.
Flood zones, exposed ridges, deep snow loads, high wind, wildfire conditions, or places with falling-tree hazards.
Carry a tarp or emergency bivy. A natural shelter is labor-intensive and should be an emergency or permitted skills-practice option.
Stage 01
Choose a Safe Site
Look for naturally level, well-drained ground with enough dead-and-down material nearby. A slight rise is usually better than a hollow. Consider prevailing wind and orient the smallest opening away from it.
- Look upAvoid dead limbs, leaning trees, damaged trunks, loose rock, and snow-loaded branches.
- Look downAvoid dry streambeds, flood marks, unstable slopes, ant nests, standing water, and hidden holes.
- Look aroundStay away from animal dens, game trails, beehives, roads, cliffs, and isolated tall trees during storms.
- Check permissionCutting vegetation or building structures may be prohibited. Prefer dead-and-down material and dismantle practice shelters.
Stage 02
Gather Before You Build
Main poles
Long, sound poles form the primary cone or dome. They should be free of rot, major cracks, and dangerous sharp projections.
Rib poles
Lighter poles fill the gaps around the frame and support the covering without leaving broad unsupported spans.
Crosspieces
Short horizontal branches tie the ribs together and give bark, brush, or a tarp something to catch on.
Cover and bedding
Use legal dead vegetation, bark, leaf litter, or a tarp. Keep dry bedding material separate from wet exterior cover.
Useful kit items include gloves, cordage, a folding saw where legal, a groundsheet, and a tarp. Do not strip living bark or cut green trees without explicit permission.
Stage 03
Build the Base Frame
- 01
Mark the footprint
Lie down with your gear to estimate the smallest practical interior. Mark the perimeter while leaving a narrow entrance.
- 02
Raise the primary poles
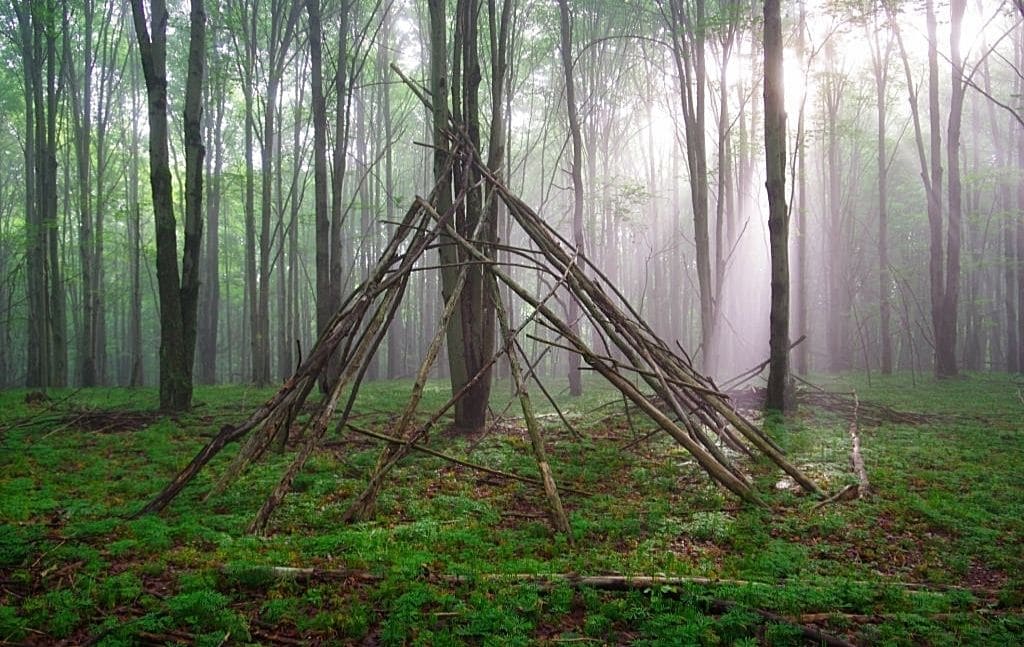
For a conical frame, lash three main poles into a tripod and spread the feet evenly. For flexible saplings that may legally be used, bend and lash opposing pairs into a dome.
- 03
Add ribs
Lean additional poles at close, even intervals. Seat every base firmly so it cannot kick outward when the roof is loaded.
- 04
Brace the structure
Weave or lash horizontal crosspieces around the ribs. Push and shake the empty frame from several directions; repair movement now.
Stage 04
Layer the Covering
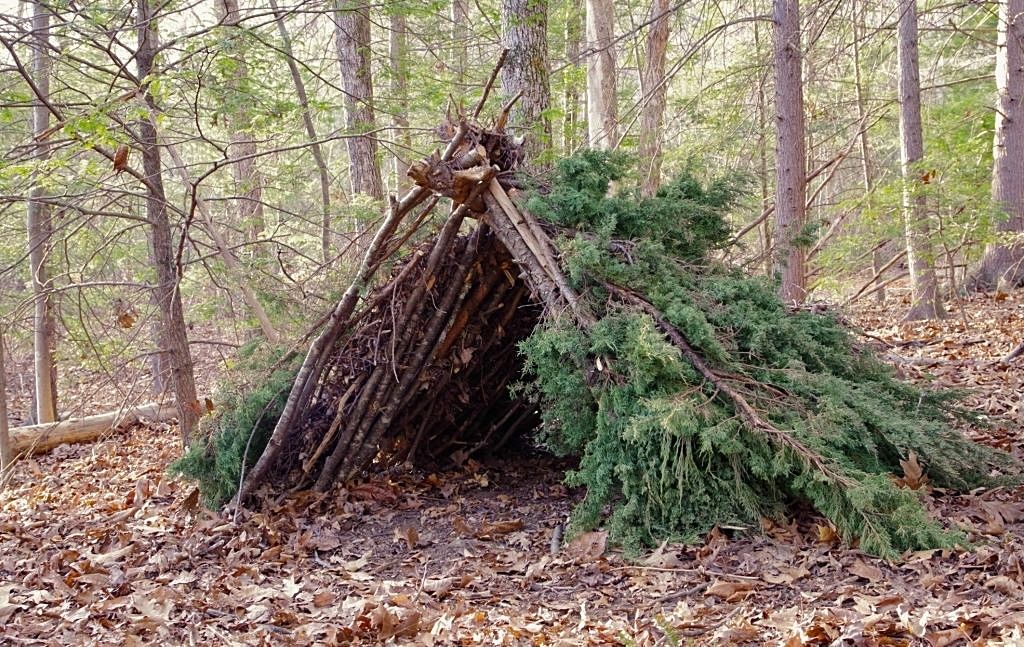
Begin with a structural lattice of small branches. Add covering from the bottom upward so rain travels over each layer rather than behind it. Work around the shelter in even courses and make the windward side the thickest.
Use a tarp, broad bark where legal, dense brush, or bundled grass arranged to overlap.
Dry leaves, grasses, and fine debris insulate only when held in place and kept reasonably dry.
Ribs and crosspieces prevent the covering from collapsing into the sleeping space.
Do not seal the shelter airtight. Moisture from breathing must escape, and a small high vent reduces condensation. This ventilation does not make an indoor fire safe.
Stage 05
Insulate the Floor
Cold ground draws heat away quickly. Remove sharp debris, lay down a waterproof groundsheet if available, then add a deep, springy layer of dry vegetation beneath your full body. Compress it with your weight and add more until you no longer feel the ground.
Keep the driest materials here and leave enough room to turn without touching wet walls.
Create a removable windbreak rather than a fixed barrier that could trap you inside.
Redirect surface water only with shallow channels where digging is allowed; never trench deeply around tree roots.
Stage 06
Inspect, Maintain, and Dismantle
- Push the frame from every side and replace cracked or shifting poles.
- Check the roof from inside for daylight and thin areas, but preserve ventilation.
- After rain or wind, inspect before entering; saturated material is much heavier.
- Keep food sealed and away from the sleeping area to avoid attracting animals.
- When finished, dismantle the shelter if required, scatter natural materials, pack out cordage and trash, and restore the site.
The practical takeaway
Small, Stable, Dry, and Legal
The best natural shelter is not the largest or most elaborate. It is the one placed outside the hazard zone, built from permitted materials, stable before it is covered, insulated from the ground, ventilated, and completed before bad weather arrives.